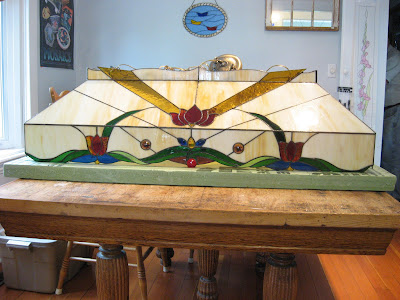
If you saw your lamp, with a gap like this, hanging from above your kitchen table, would you be concerned? Well my customer was!
After having the electrician remove it, he brought it to my studio. I must tell you that I let it sit on the workbench for a few days before I even got up the nerve to touch it.
First I removed the top pieces that would allow me to get to the trouble area.
Then I removed all the copper foil from the effected area and cleaned the glass. When I removed the old foil and solder, this helped to close the gap.
The pieces were then all refoiled. My favourite tool (the two inch thick telephone book) was placed on the crown of the lamp over night to put just enough pressure to help gravity move things back in place.
The next day I began soldering. This was one of the more challenging soldering jobs that I had done. Because of the angle of the lamp, the hot solder wanted to roll off. I turned the temperature controller on the iron down a little lower than normal so that the flow of the solder could be managed better. Because of the size and weight of the lamp, it was a feat to turn the lamp over. And without a jig, it was tricky to hold it in place at the correct angle for soldering the inside of the lamp. Have I ever told you, I thrive on a challenge?
My main concern in repairing the lamp is that it would be safe to hang back up. I had thought about what extra support I could add. When I removed the old foil, I discovered a wire that had been soldered from cross bar at the top of the lamp and followed the solder line down the lamp to the bottom. This guide wire is what kept the lamp from falling to the floor. It also allowed the lamp to come apart without breaking the glass pieces. So obviously, this wire got soldered back into place as it had been. If it served it's purpose the first time, it was definately an essential part of the design. Once again, a learning experience for me.


No comments:
Post a Comment